Setting configuration file attributes
You can set your device and FliteDeck Pro configuration file attributes on the Content page.
About this task
When you finish modifying your settings, Jeppesen Distribution Manager Pro (JDM Pro) shows an XML file for you to review before publishing.
If you enter an invalid response, JDM Pro shows a warning that describes the error. The system also sets the parameter page name in red. You can't save a file that includes an invalid setting.You can edit existing configuration files at any time. For more information, see Editing configuration file attributes.
Procedure
- From the Content page, select Add Content.
-
Select Create.
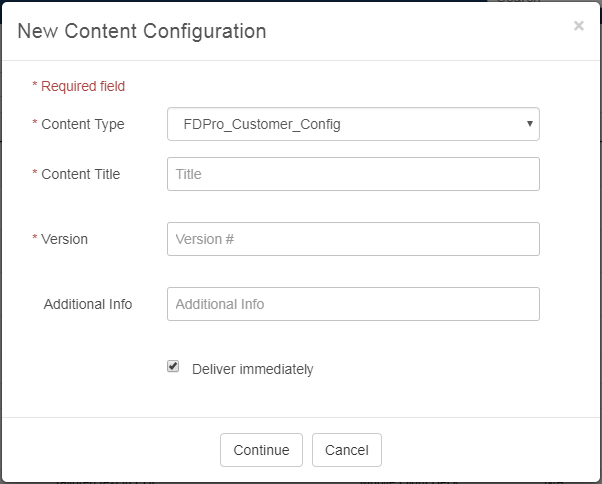
JDM Pro shows the New Content Configuration dialog.
FigureNew Content Configuration dialog 
-
Enter the proper information for your configuration file:
- From the Content Type
menu, select the appropriate type.Note: The Content Type list includes only those content types that are associated with your company. For example, depending on your company, you might see FDPro_Customer_Config.
- In the Content Title
dialog, do one of the following steps:
- If the file is one that you've never uploaded, enter a name for the content.
- If the file is a new version of content that you've already created, select the appropriate title.
- Enter the version number. You can enter up to 50 characters
with up to four levels (#.#.#.#).
- If the file is a new content item, create a version number.
- If the file is a new version of previous content, create
a version number based on the previous one. JDM Pro indicates the previous version
number in the Version Number
dialog.Note: If you upload a version of content that is lower than the current version, JDM Pro sets the new content to Deauthorized.
- In the Additional Info
field, enter a brief description of the content. The information you enter here
appears in the Additional Info field in
the Content Detail dialog for the content
item.Note: JDM Pro prevents you from entering more than 255 characters in the Additional Info field.
- If you want devices to be able to download the data immediately after it becomes available, select the Deliver Immediately checkbox .
- From the Content Type
menu, select the appropriate type.
-
Select Continue.
JDM Pro displays the Application Behavior page.
-
Set the parameters for each setting you want to change.
If you set a parameter to Optional, the user can modify the setting on the device.
- To set parameters for a different topic, select an item from the menu on the left. You can also select NEXT at the bottom of each page to progress to the next section.
-
When you have set all of your parameters, select Configuration Review.
JDM Pro displays the Verify Metadata page.
-
Verify that the information is correct, and then select Continue.
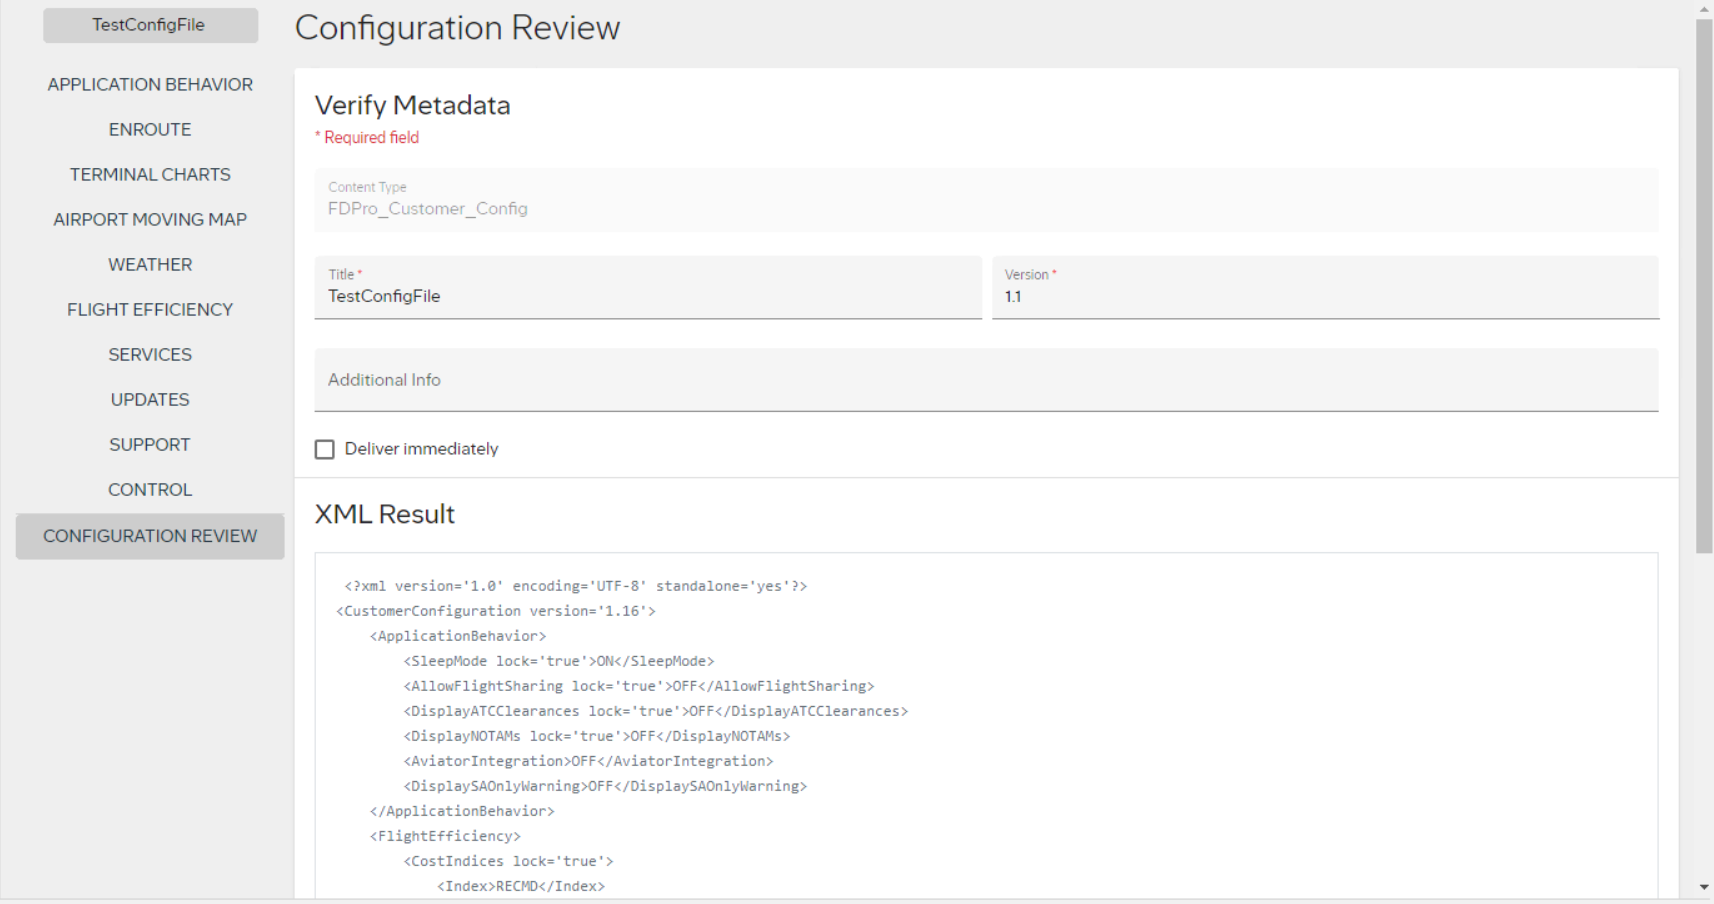
JDM Pro displays the Configuration Review page, which includes the XML result.
FigureConfiguration Review section 
-
Select Publish.
JDM Pro publishes the configuration file, adds it to the Content list, and displays a success message. Like other content, the file is sent to devices based on your distribution group and content settings.
Tip: If you don't see the content on the Content page, wait for a minute, and then refresh the browser.
