Uploading content into JDM Pro
After you've created and packaged the content, you can upload it to Jeppesen Distribution Manager Pro (JDM Pro).
About this task
Important: Jeppesen recommends that you use
a browser that supports HTML 5. If you're using a browser that doesn't support HTML 5,
JDM Pro can't compute the MD5 digest
value for the file that you're uploading. In this instance, enter an appropriate MD5
value for the file during the upload process and create the ADEL metadata file.
Procedure
- From the Content page, select Add Content.
-
Select Upload.
JDM Pro displays the Select a File dialog.
- Select Browse.
- Navigate to the content .zip file that you want to import, select it, and select Open.
-
Select OK.
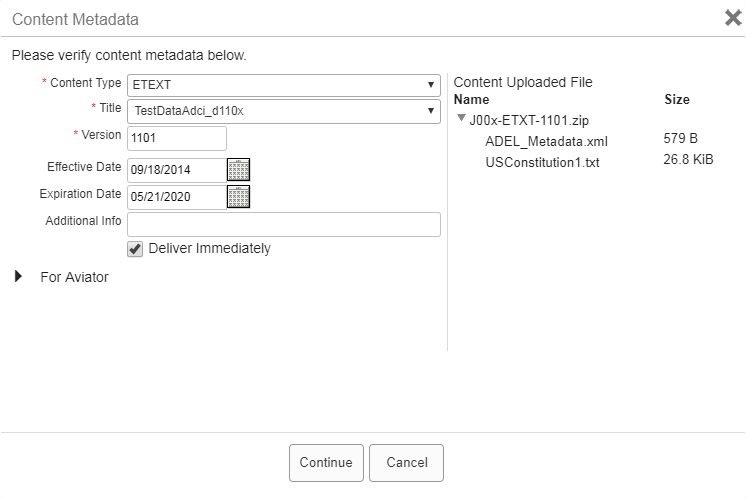
JDM Pro uploads the content, runs a virus check, and then displays the Content Metadata dialog.
FigureThe Content Metadata dialog 
-
Add or modify the metadata information in each field in the Content
Metadata dialog.
An asterisk shows which fields are required. JDM Pro prevents you from entering invalid characters in the Content Metadata dialog.
- From the Content Type menu, select the appropriate
type.
- If you're uploading a Customer-Inserted Chart (CIC) or custom chart, select CICCharts.
- If you're uploading a company document, select ETEXT.
- If you're uploading tailored data from Ground Controls, select JTXT.
- In the Title box, do one of the following steps:
- If the file is one that you've never uploaded, enter a name for the content.
- If the file is a new version of content that you've already uploaded, select the appropriate title.
- Enter a version number for the document:
- If the file is a new content item, create a version number.
- If the file is a new version of content already uploaded, create a
version number based on the previous one. JDM Pro indicates the previous version number in the
Content Metadata dialog.Note: If you upload a version of content that is lower than the current version, JDM Pro sets the new content to Deauthorized.
- Enter an Effective Date and an Expiration Date.
- In the Additional Info box, enter details about the content that might help other personnel.
- From the Content Type menu, select the appropriate
type.
-
If you want devices to be able to download the data immediately after it becomes
available, select the Deliver Immediately checkbox.
Note: If you select Deliver Immediately for content being delivered to FliteDeck Pro (iOS), FliteDeck Pro notifies the user when the new content is available. FliteDeck Pro (Windows) always downloads new content when it becomes available and immediately notifies the user of the unscheduled update.
-
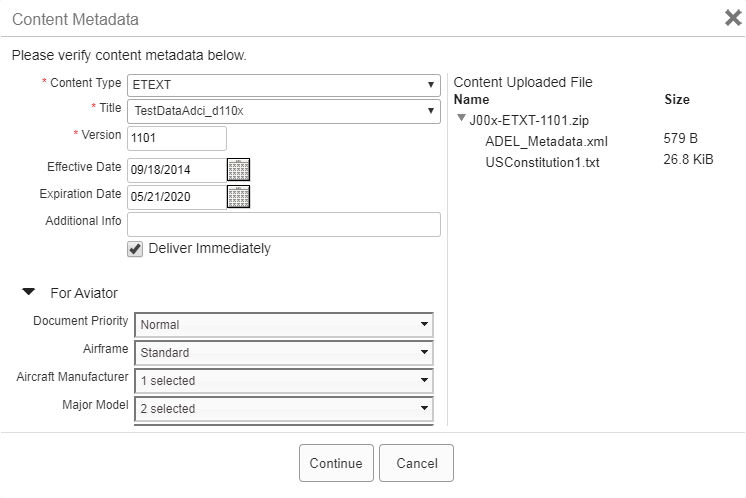
If your pilots use the Jeppesen Aviator app to navigate EFB apps, select
For Aviator and select the appropriate options.
FigureContent Metadata box with Aviator section  Note: The information you enter in the For Aviator section appears in the Content Version Details box.
 -
Select Continue.
JDM Pro uploads the file and adds the content item to the Content list.Tip: If you don't see the content on the Content page, wait for a minute, and then refresh the browser.
